January 12, 2010
Beach Landscape #2
January 5, 2010
The Process...Part II
A view of my Design WallThis is part II of how I create my art quilts. As you read in yesterday's post, I now have it pinned to the wall. Since my iron is close to my design wall, I can gently fuse any of the fusible pieces while it is still on the design wall. (My design wall is insulation foam covered with cotton batting.) I only "touch lightly" with the iron as I don't know if it will melt or not. I pin the rest of the pieces. I don't want it fused too much as I am still tweaking as I go.
pinned and ready to begin quilting
tracing paper over sketch

My Process...Part I
Original photo
Sketch
I cut the backing and batting larger than my finished art piece and layer them and pin to the design wall. Then, I make a sketch by just looking at the photo. When I like the general sketch, I trace over my pencil lines with a Sharpie pen. If I want to keep it this size, then I use this for a pattern. If I want to make it larger, I trace it to transparency film and use my overhead projector. I would then have to trace it to a larger size paper. Now that I have the pattern sheet to the size I want, I place it on a light box. At this point, some of my pieces will have Wonder-Under applied and some will not. I place the Wonder-Under (lite) over the pattern and trace. I then iron it to the fabric and cut it out. Then, I pin to the wall and keep tweaking until I have the "first draft" of my art piece. Everything is pinned in place.

January 4, 2010
Work in Progress...a new series
Happy New Year to all!! I have a new resolution to make more art and blog about it! Thanks to all of you who do read my blog. I recently joined the SAQA Visioning project which I think will be a great learning experience for me. It's time to quit procrastinating and make more art and enter more shows. The two works-in-progress above are beginnings from two sketches I did inspired by my photographs of the beach. It's a new series! I actually have a third one on the design wall which isn't in this picture. I'm still tweaking them before any quilting begins. As you can see, there are fabric "guts" stuck to the design wall waiting to be used or tossed. Tomorrow, I will post about my process. Just wanted to get started on the blog posting today.
November 16, 2009
At last...a finished piece
The hand dyed fabric reminded me of a stream running through a meadow, so I just went with it when I quilted it. I had an old frame handy and decided I liked it framed. It is 8"x10" inside an 11"x14" frame.
September 23, 2009
New Work Revisited
September 22, 2009
Knitting Insanity

September 15, 2009
Machine Quilting designs and Other Important Stuff
I have been thinking of making a whole cloth quilt using some of my machine quilting motifs. I keep samples of machine quilting designs and stitches (each about 12" sq. or so) pinned together. When I can't decide what stitch to use, I quickly flip through them to find something I want to use on a particular quilt. Lots of times, I start to quilt and end up with a totally different design. The design above is done on muslin using yellow thread. My inspiration for designs usually come from nature. There are so many intricate lines and curves and swirls in leaves and flowers or even the bark on a tree. I must get back to work on my art this week.
When I was in California, I bought Emma a yellow rain slicker at an Old Navy store. She looks so cute in it and even got to wear it once. This is a picture of her dad taking her out in the rain. (He reluctantly did so because any dog dressed in clothes is embarrassing to him). LOL! But she wore it and never tried to pull it off. She loves to wear her sweaters in the winter, too.
And if you can't get enough Emma pics, here she is in our back yard at our other house in Columbus, OH. It's a huge back yard and has a fence. She loves to run and chase her ball. I do miss having a back yard here...at this house, there is no fence and it's very small. So, we call the house in Columbus our country house. September 10, 2009
This Quilt's For Me!
My New Quilt
Quilted details
Back of quiltSeptember 9, 2009
What I did This Summer...
Traci & me (in California)
3 Leaves (quilted)
3 Leaves (detail)July 20, 2009
New Quilt and What I have been doing
July 3, 2009
More QSDS

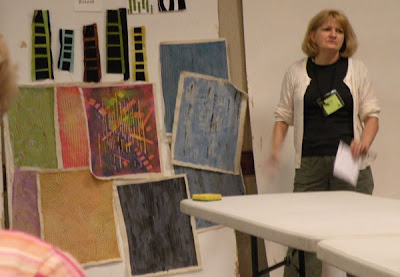
Here are a few of the paintings I did at QSDS...I made painted fabric, not pictures. I really like the effect of layering paint. It is all done on 7 oz. canvas using fabric paint and thus is easy to sew to other fabrics. The top piece has many layers and was an experiment. It might be hard to cut these up and use them in quilts.July 2, 2009
QSDS (Quilt Surface Design Symposium)

QSDS was 7 wonderful and intense days of art composition, painting and fun! I took a master class with Elizabeth Busch. I highly recommend her as an instructor if you ever get to take a class with her. I came away feeling refreshed about my art work. I can see me going in an almost different but better direction with my art. This class really made me think about composition, color and how to better interpret my designs in fabric. I ended up putting away the two pieces I had planned to work on and started a new design. The board shows my paintings and some pieces of the new work. I got to room with my good buddy, Susan Nash, who is a very talented art quilter and always inspires me. Each day, we did little 4" x 6" studies on index cards...the designs aren't in these photos. I will save those for a later time when they are made into quilts.
It's good to be back home, but it was nice to be in an artist environment for a while. (no cleaning, no cooking and big, fat chocolate chip cookies or cheesecake at each meal).
Check back tomorrow...I will have some details of the paintings.


We are just a metro ride to the Capitol